
- Open a browser and type 192.168.0.1 in the address bar.
- Enter User Name admin and Password admin and click Login.
- Click on Wireless tab > and choose Basic Settings from the left menu.
- Select Security Type WPA2-Personal and AES for Encryption Type.
- Enter the WiFi password in the Passphrase/Key field.
- Click Apply to save the changes.
- Open a browser and type 192.168.1.1 in the address bar.
- Enter User Name admin and Password admin and click Login.
- Go to Wireless > and select Basic Settings from the left menu.
- Select WPA/WPA2 Security and enter the WiFi password in the Pre-Shared Key (PSK) field under Home Network.
- Click Apply to save the settings.
- Open a browser and type 192.168.0.1 in the address bar.
- Enter Default User ID admin and Password password or password1 and click Login.
- Click Wireless Settings > then Basic Settings from the left menu.
- Enter your WiFi password in the WEP key in section 5 and click Apply.
- Open a browser and type 192.168.254.254 in the address bar.
- Enter Admin in the Name field and Password which is printed on a label on the back of your router.
- Wireless from the top menu > Total Control Wireless.
- Choose SSID 2.4 GHz or 5GHz.
- Enter WiFi name in the Network Name (SSID) field.
- Enter WiFi password in the Password field.
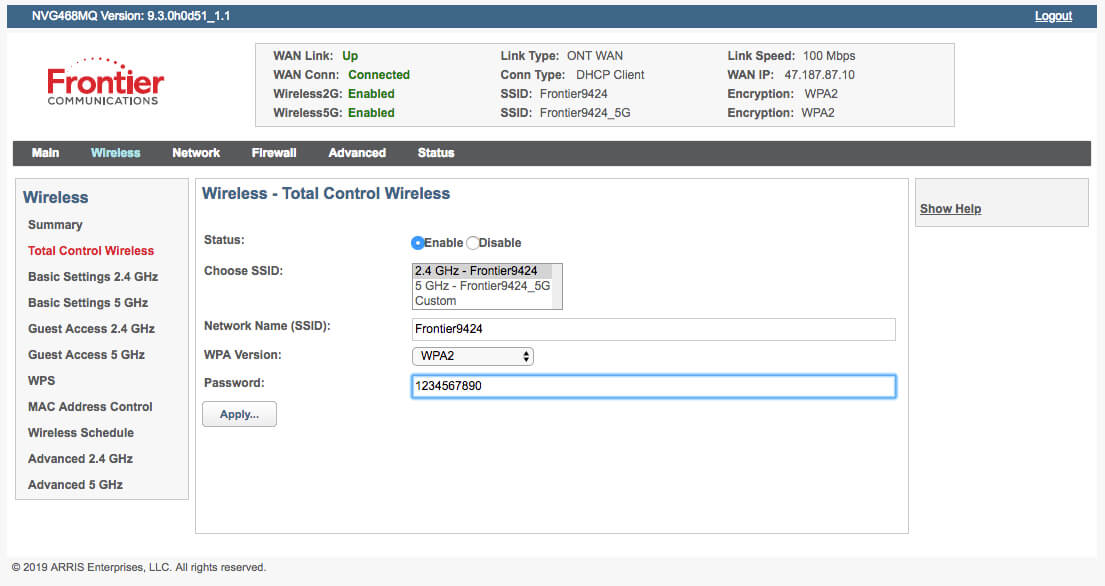
- Click Apply to save the changes.
- Open a browser and type 192.168.1.254 in the address bar.
- Click on the Home Network option from the top of the page.
- Choose Wireless and, if prompted, enter the Access Code which is printed on the back or side of your router.
- Enter a WiFi name in the Network Name field.
- Select WPA – Custom under Security settings and enter WiFi password in the Key field.
- Click on the Save button.
- Open a browser and type 192.168.1.1 in the address bar.
- Enter Username admin and the Password that is printed on the bottom of your router and click Login.
- Click on SETUP > 2.4G Wireless.
- Enter the name of your WiFi network.
- Choose WPA2 as Security Mode under Wireless Security Mode.
- Choose WPA2-PSK (Personal) in the WPA Mode.
- Enter the WiFi password in the Pre-Shared Key field.
- Click Apply to save the changes.
- Open a browser and type 192.168.1.1 in the address bar.
- Enter the Admin Password which is printed on the back or side of your router and click Next.
- Select Change Wireless Settings from the lower left-hand side.
- Enter the WiFi Name in the SSID field. (FiberOptic router has two different wireless network, enter the name for both.)
- Select Security Type WPA2-Personal and AES for Encryption Type.
- Enter the WiFi password for both networks.
- Click Apply.
- Open a browser and type 192.168.254.254 in the address bar.
- Enter User Name admin and Password admin and click OK.
- From the Wireless Settings tab, click on Simple Config in the left menu.
- Select Use Push Button and click Enable Simple Config and enter the Network Name (SSID).
- Now click Security Settings and set the Wireless Security mode to WPA and Authentication mode to Personal (Pre-Shared Key).
- Select WPA as WPA Type and AES as the Data Encryption type.
- Enter the WiFi password in the WPA Shared Key field.
- Click on the Apply button.
- Open a browser and type 192.168.254.254 in the address bar.
- Go to Wireless Settings and click on Basic Settings.
- Enter your WiFi Network Name in the SSID box.
- Now go to Advanced Security Settings or Security Settings from the menu.
- Select WPA Wireless Security and then create a WPA Shared Key to enter your WiFi password.
- Click Apply.
- Open a browser and type 192.168.1.254 in the address bar.
- Under Top Networking Features on the home screen, select Wireless.
- Enter Network Name (SSID) and scroll to the bottom and click Save.
- If prompted, enter the Password printed on a label on the back of your router and click Submit.
- To create a new password for your WiFi network, scroll down and select on Set Custom Encryption Key and type your preferred password.
- Click Save to apply the changes.