
Claro web-based user interface allows you to change WiFi password, Network Name (SSID), and default modem settings at http://192.168.1.1 or http://10.0.0.1.
How to login to Claro modem?
- Open a browser and type http://192.168.1.1 or http://10.0.0.1 in the address bar.
- Enter the Username and Password and click Login.
- You will be logged in to the Claro modem settings.
Default Claro Username and Password
| Router Brand | IP Address | Username | Password |
|---|---|---|---|
| Technicolor DPC3928SL2 | 192.168.1.1 | admin | Cl@r0 |
| ZTE ZXHN H108N | 192.168.1.1 | admin | Cl@r0 |
| Eltek A7600 | 192.168.1.1 | admin | Cl@r0 |
| Eltel 5300 | 192.168.1.1 | admin | Cl@r0 |
| TecnicolorTC71101 | 192.168.1.1 | admin | @m3r!c@m0v!L |
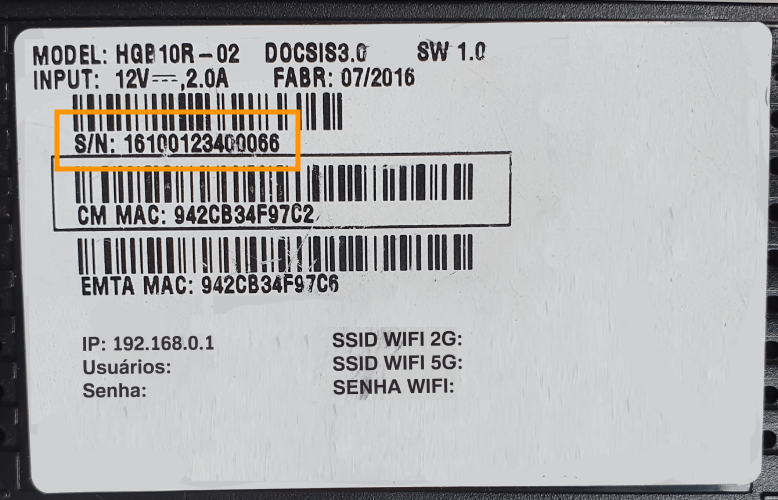
| Huawei HG532E / HG531v1 | 10.0.0.1 | admin | Modem Serial Number (S/N) |
| Huawei HG8245H / HG8245H | 10.0.0.1 | Modem Serial Number (S/N) | Modem Serial Number (S/N) |
| ZTE H108N | 10.0.0.1 | admin | Modem Serial Number (S/N) |
| ZTE H167A | 10.0.0.1 | admin | Modem Serial Number (S/N) |
| Sagemcom Fast 4315 | 10.0.0.1 | admin | Modem Serial Number (S/N) |
| Zyxel VMG-1312-B10B / T20B | 10.0.0.1 | admin | Modem Serial Number (S/N) |
| Huawei HG8145v5 | 10.0.0.1 | Modem Serial Number (S/N) | Modem Serial Number (S/N) |
Note: The Serial Number (S/N) is printed on the back of your modem.
How to change Claro Wi-Fi Password and Network Name?
- Open a browser and type http://192.168.1.1 in the address bar.
- Enter the Username: admin and Password: Cl@r0 and click Login.
- Select Setup > Quick Setup.
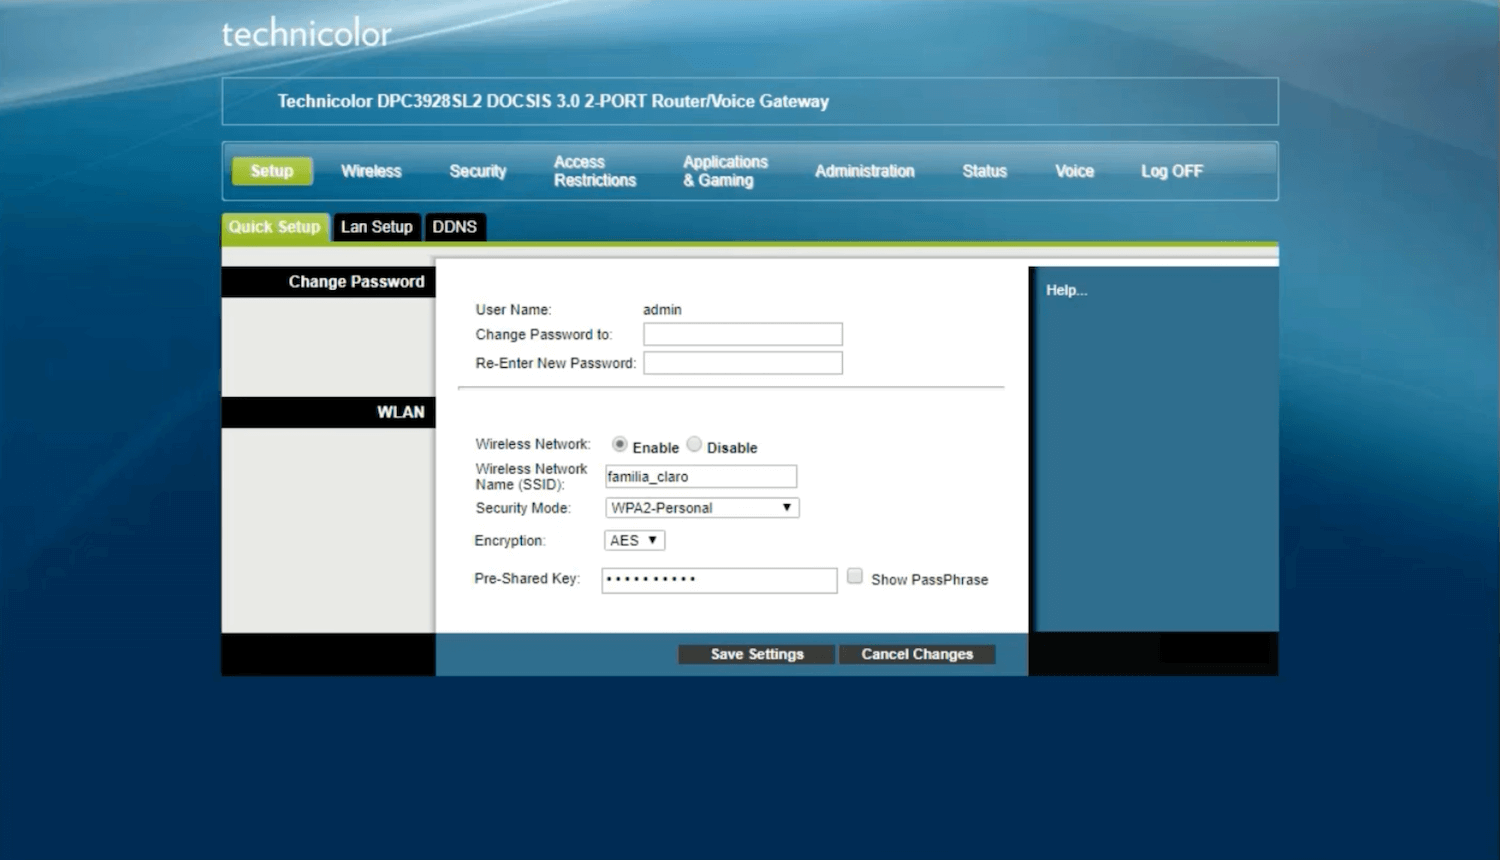
- Enter the Wi-Fi Network Name in the Wireless Network Name (SSID) field.
- Enter the Wi-Fi Password in the Pre-Shared Key field.
- Click Save Settings.
- Open a browser and type http://192.168.1.1 in the address bar.
- Enter the Username: admin and Password: Cl@r0 and click Login.
- Select Network > WLAN > SSID Settings.
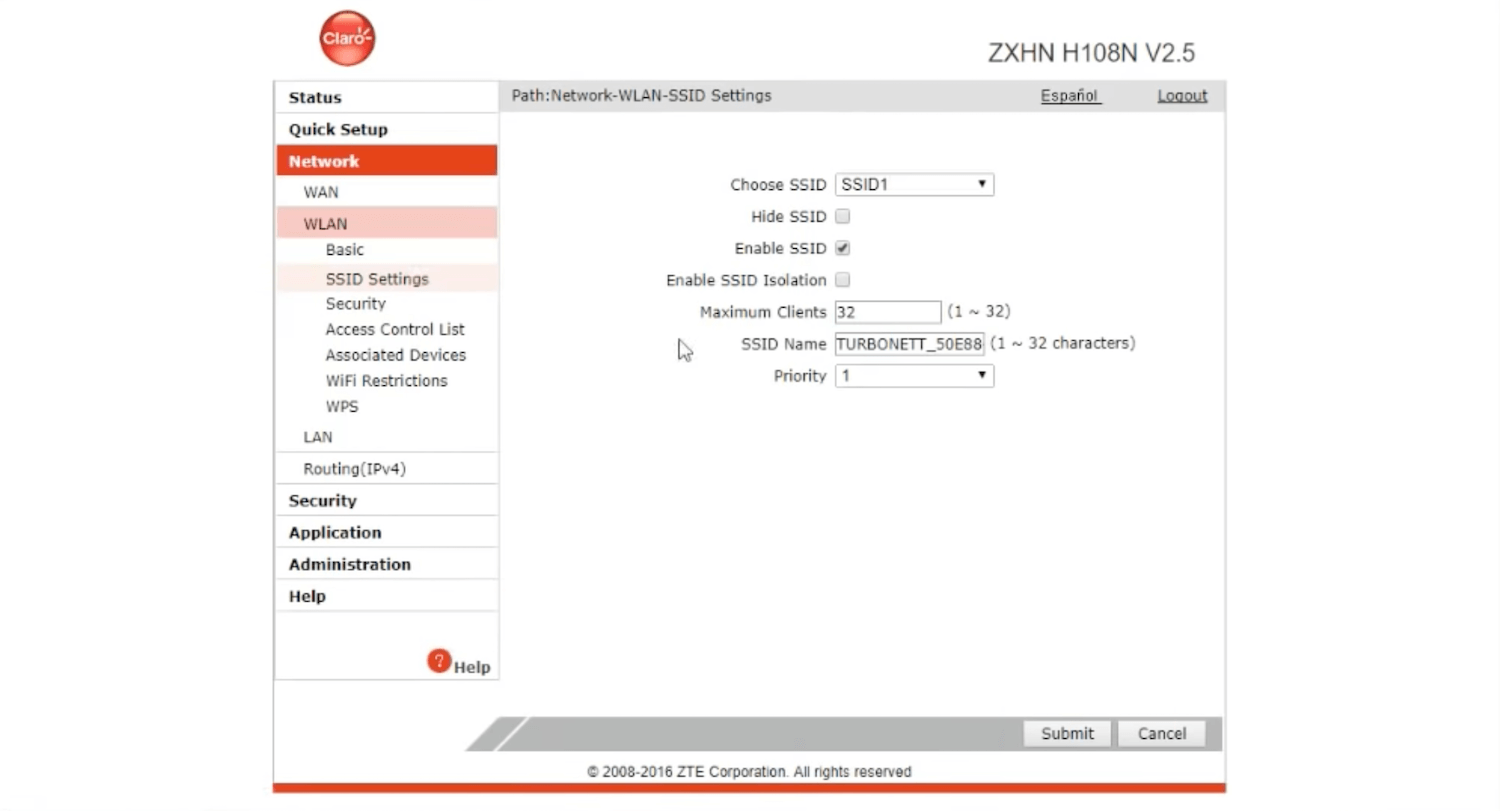
- Enter the Wi-Fi Network Name in the SSID Name field and click Submit.
- Select Network > WLAN > Security.
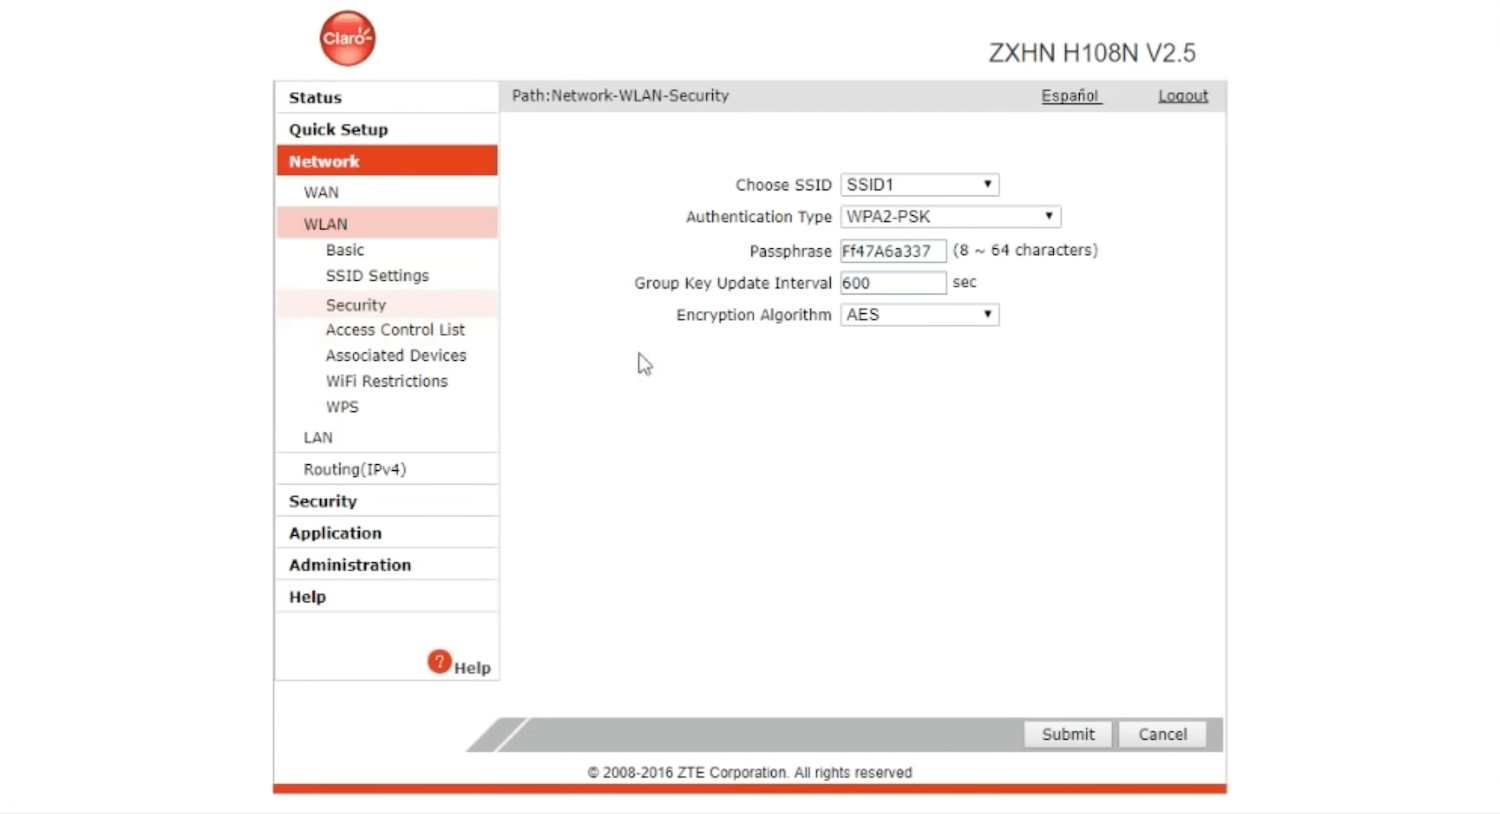
- Enter the Wi-Fi Password in the Passphrase field and click Submit.
- Open a browser and type http://192.168.1.1 in the address bar.
- Enter the Username: admin and Password: Cl@r0 and click Login.
- Select Configuración Básica > Inalámbrica > Básica.

- Enter the Wi-Fi Network Name in the SSID field and click Guardar Cambios.
- Select Configuración Básica > Inalámbrica > Seguridad.
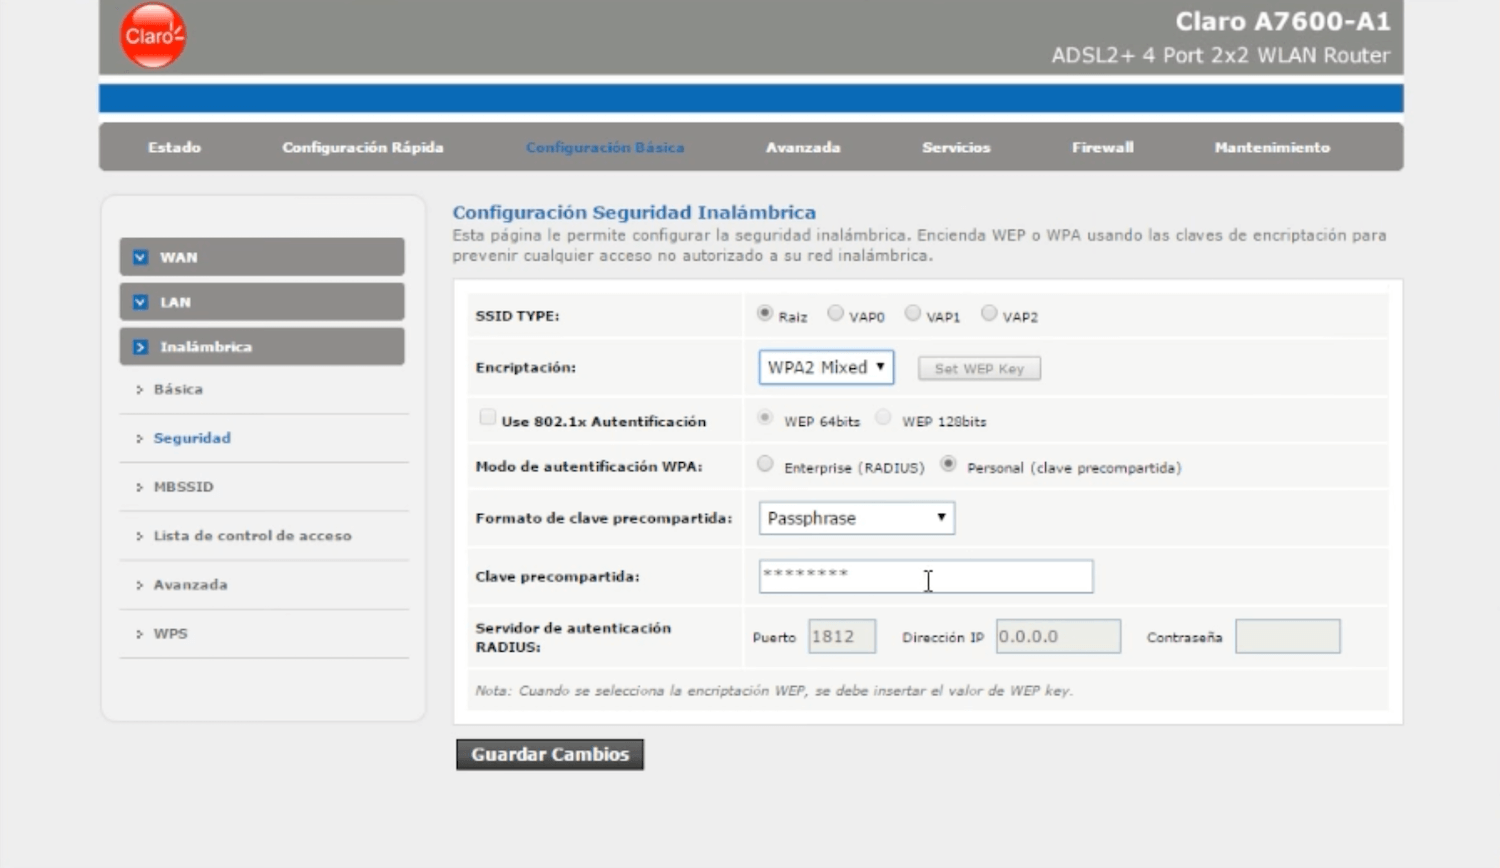
- Enter the Wi-Fi Password in the Clave precompartida field and click Guardar Cambios.
- Open a browser and type http://192.168.1.1 in the address bar.
- Enter the Username: admin and Password: Cl@r0 and click Login.
- Select Interface Setup > Wireless.
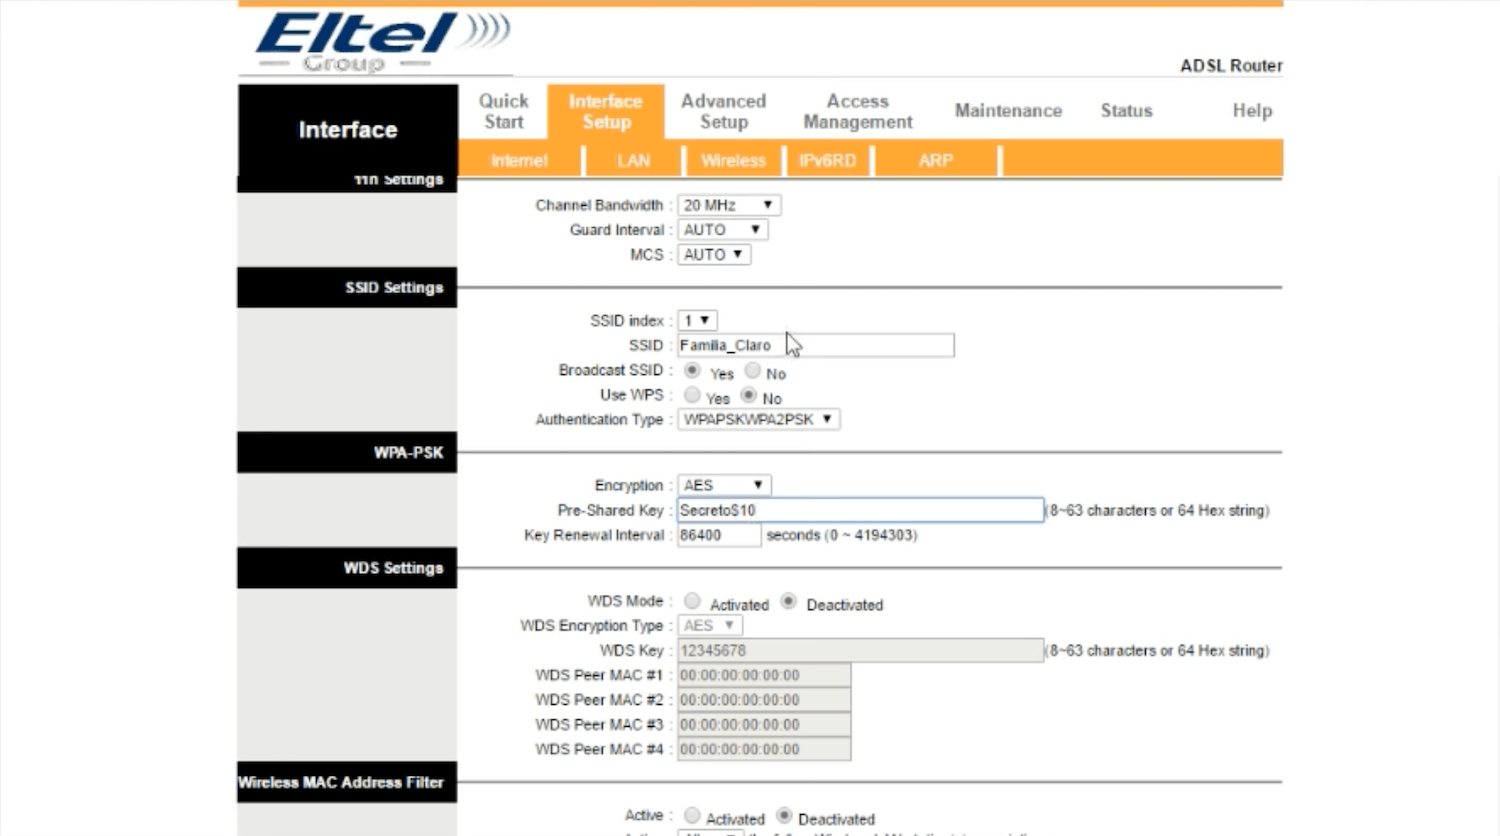
- Enter the Wi-Fi Network Name in the SSID field.
- Enter the Wi-Fi Password in the Pre-Shared Key field.
- Click SAVE.
- Open a browser and type http://192.168.1.1 in the address bar.
- Enter the Username: admin and Password: @m3r!c@m0v!L and click Login.
- Select Wireless > Primary Network.
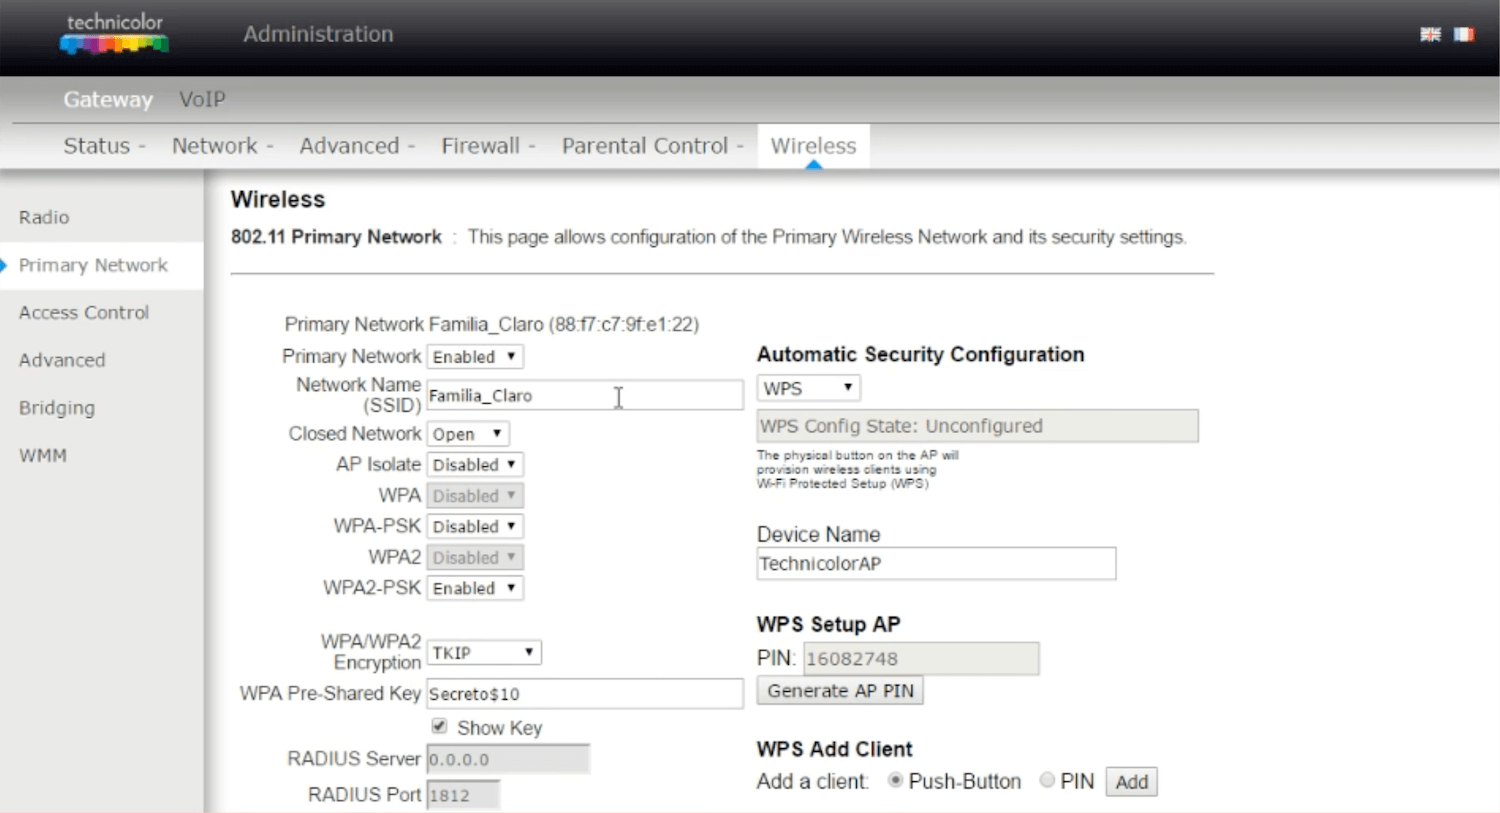
- Enter the Wi-Fi Network Name in the Network Name (SSID) field.
- Enter the Wi-Fi Password in the WPA Pre-Shared Key field.
- Click Apply.
- Open a browser and type http://10.0.0.1 in the address bar.
- Enter the Username: admin and Password and click Login.
- Select Básico > WLAN.

- Enter the Wi-Fi Network Name in the SSID field.
- Enter the Wi-Fi Password in the Clave precompartida WPA field.
- Click Enviar.
- Open a browser and type http://10.0.0.1 in the address bar.
- Enter the Username and Password and click Login.
- Select WLAN > WLAN Basic Configuration.
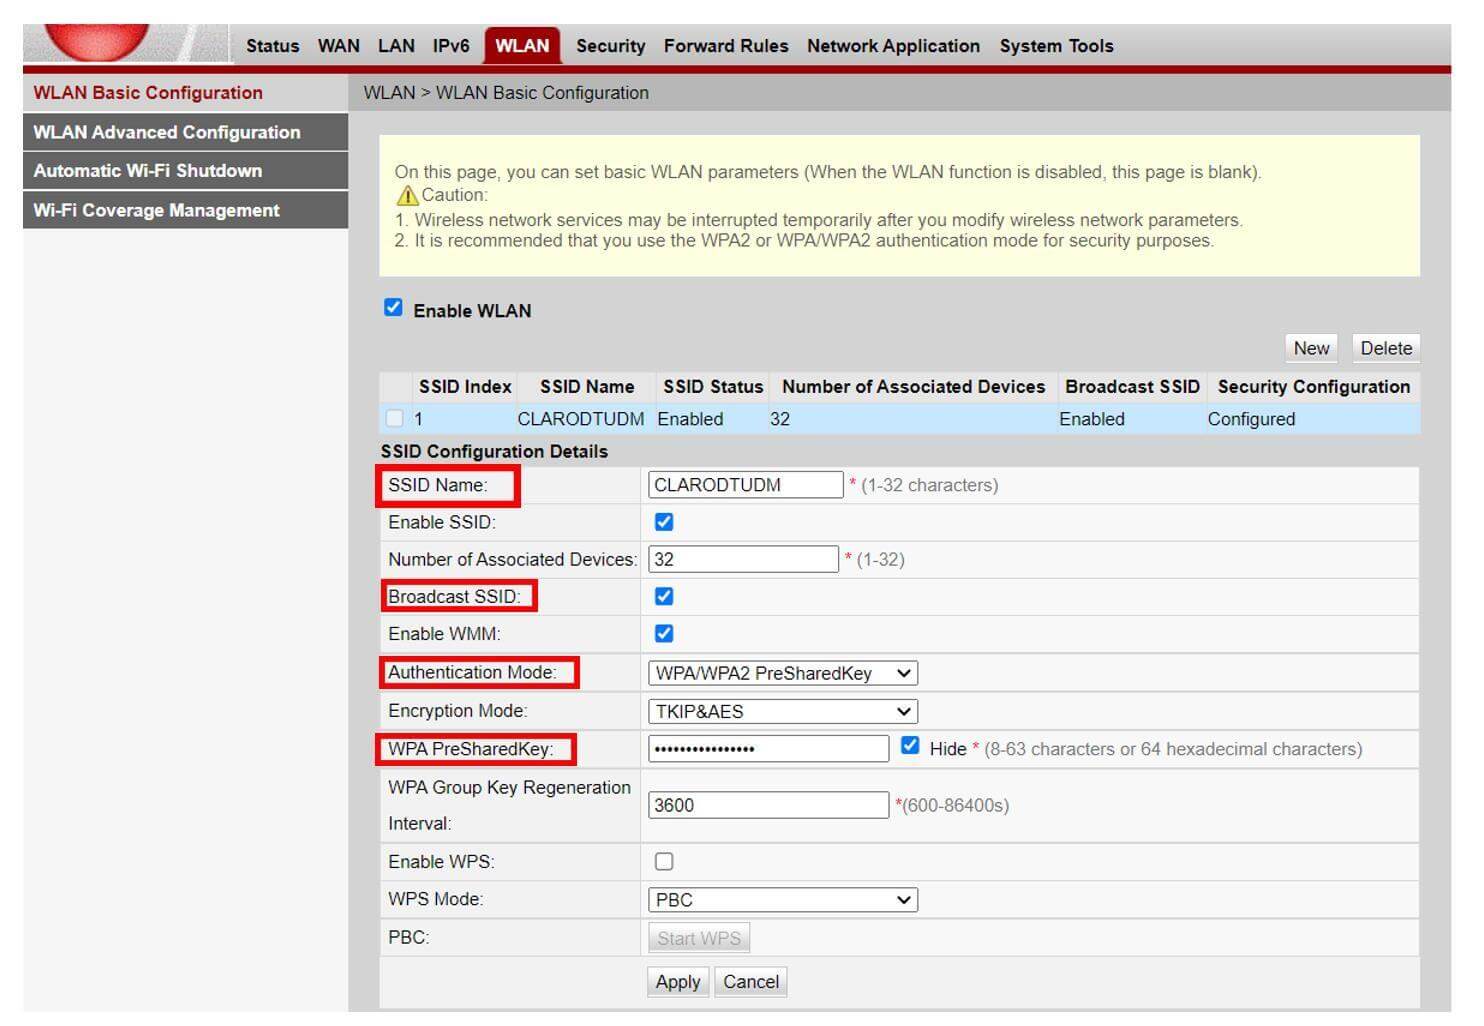
- Enter the Wi-Fi Network Name in the SSID Name field.
- Enter the Wi-Fi Password in the WPA PreSharedKey field.
- Click Apply.
- Open a browser and type http://10.0.0.1 in the address bar.
- Enter the Username: admin and Password and click Login.
- Select WLAN > Configuraciones de SSID.
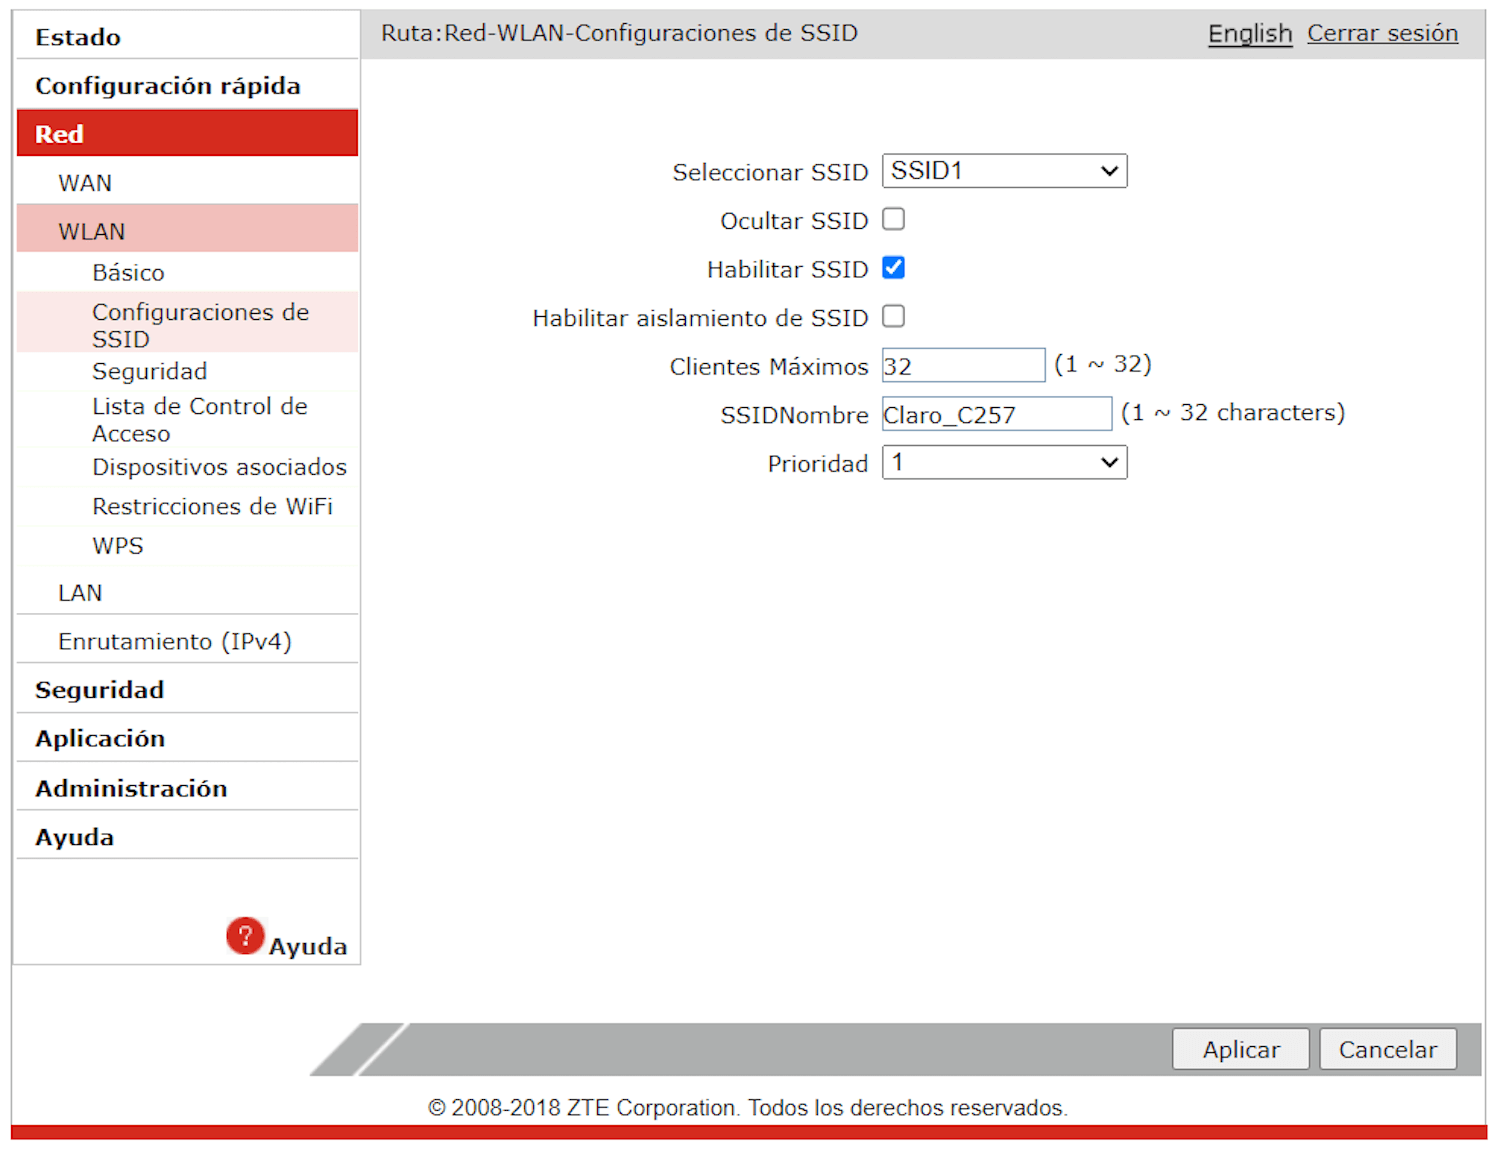
- Enter the Wi-Fi Network Name in the SSID Nombre field and click Aplicar.
- Select WLAN > Seguridad.
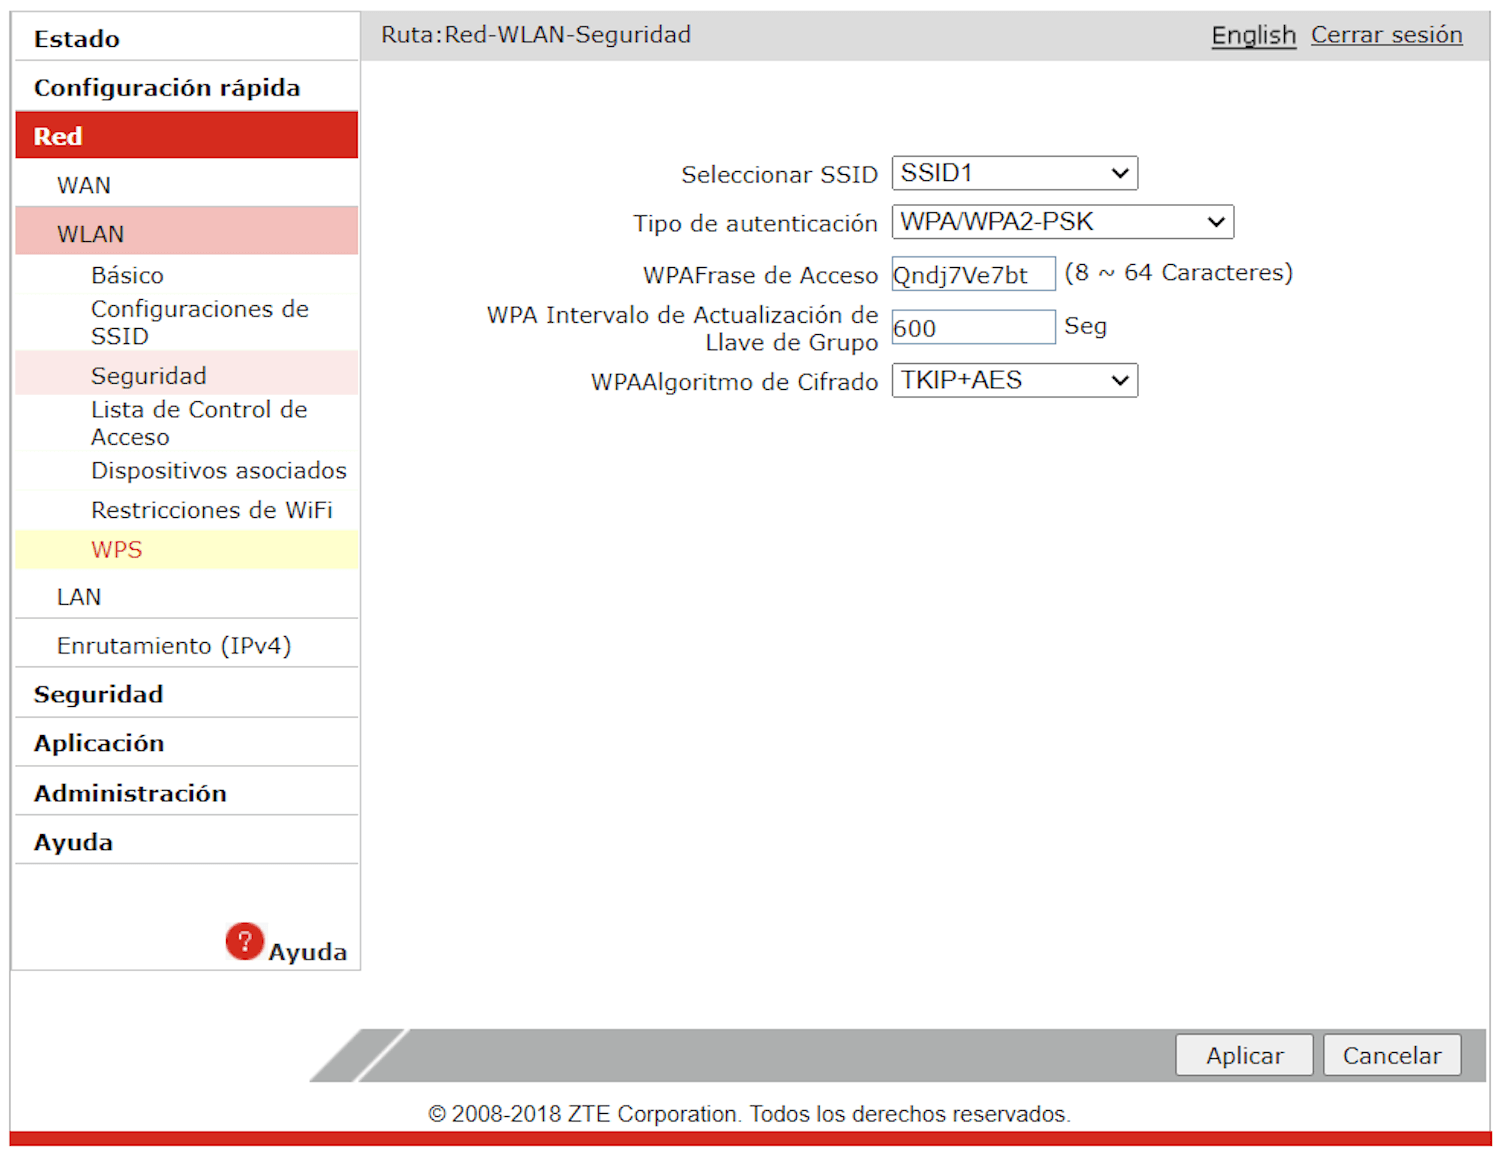
- Enter the Wi-Fi Password in the WPA Frase de Acceso field and click Aplicar.
- Open a browser and type http://10.0.0.1 in the address bar.
- Enter the Username: admin and Password and click Login.
- Select Red local > WLAN > WLAN Básico > Configuración WLAN SSID.
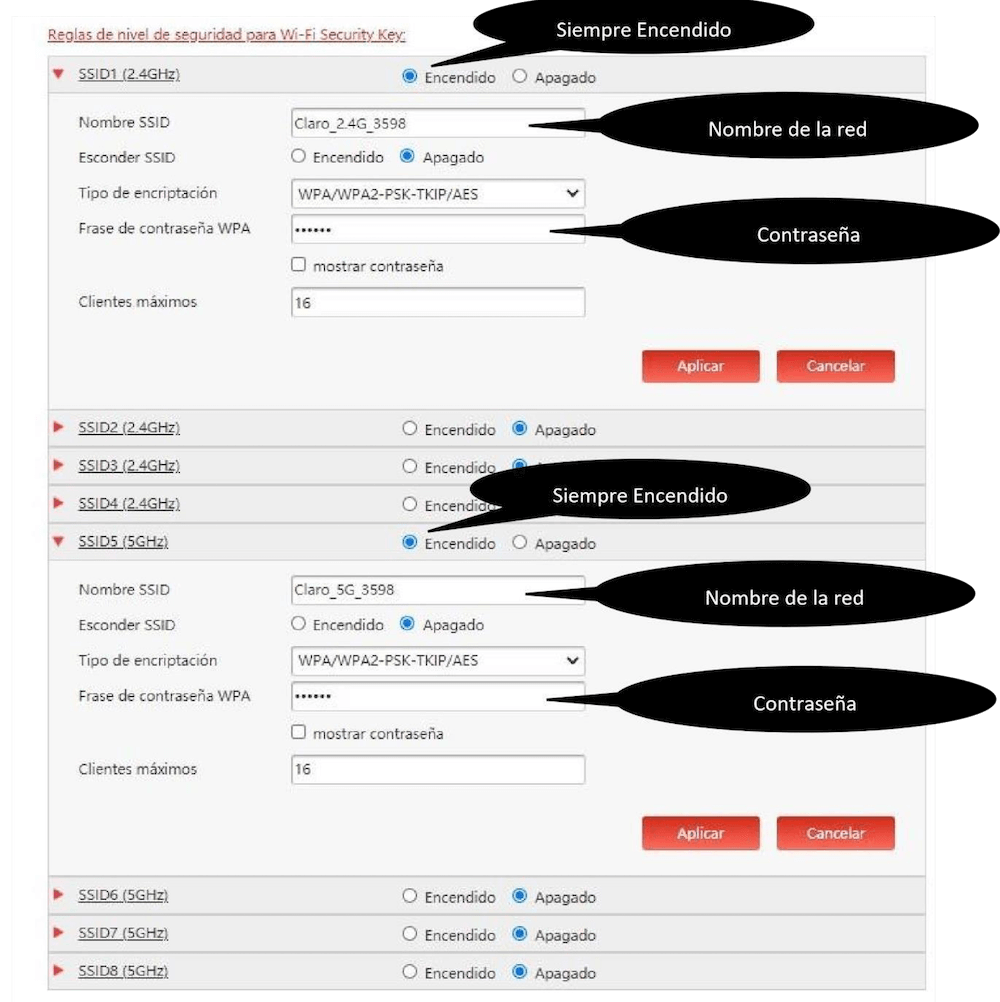
- Enter the Wi-Fi Network Name in the Nombre SSID field.
- Enter the Wi-Fi Password in the Frase de contraseña WPA field.
- Click Aplicar.
- Open a browser and type http://10.0.0.1 in the address bar.
- Enter the Username: admin and Password and click Login.
- Select Wireless > Basic.
- Enter the Wi-Fi Network Name in the SSID field and click Apply/Save.
- Select Wireless > Security.
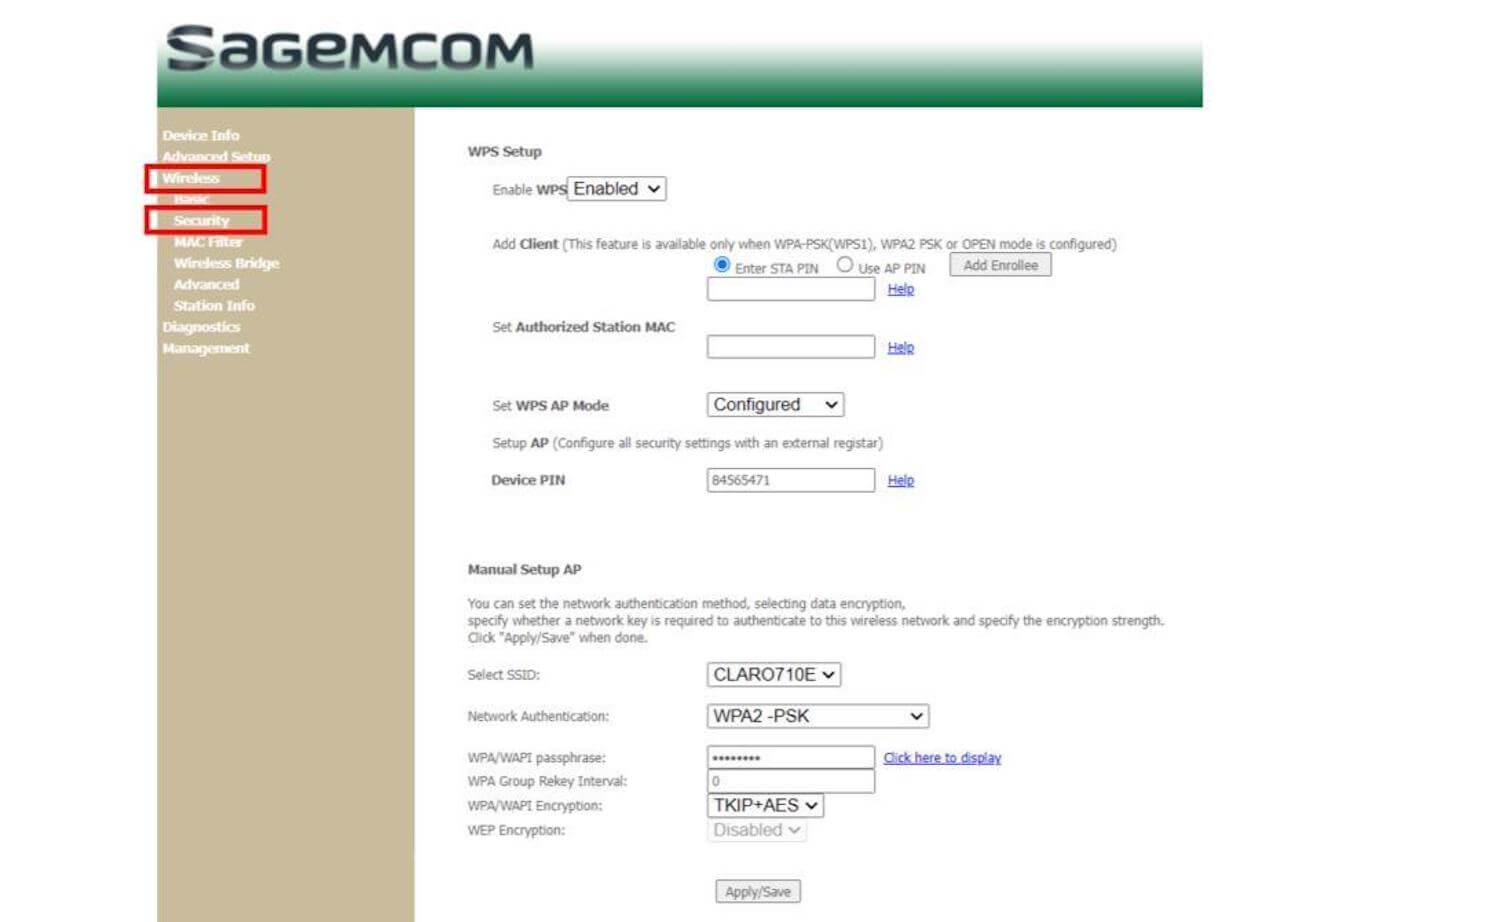
- Enter the Wi-Fi Password in the WPA/WAPI passphrase field and click Apply/Save.
- Open a browser and type http://10.0.0.1 in the address bar.
- Enter the Username: admin and Password and click Login.
- Select Network Settings > Wireless.
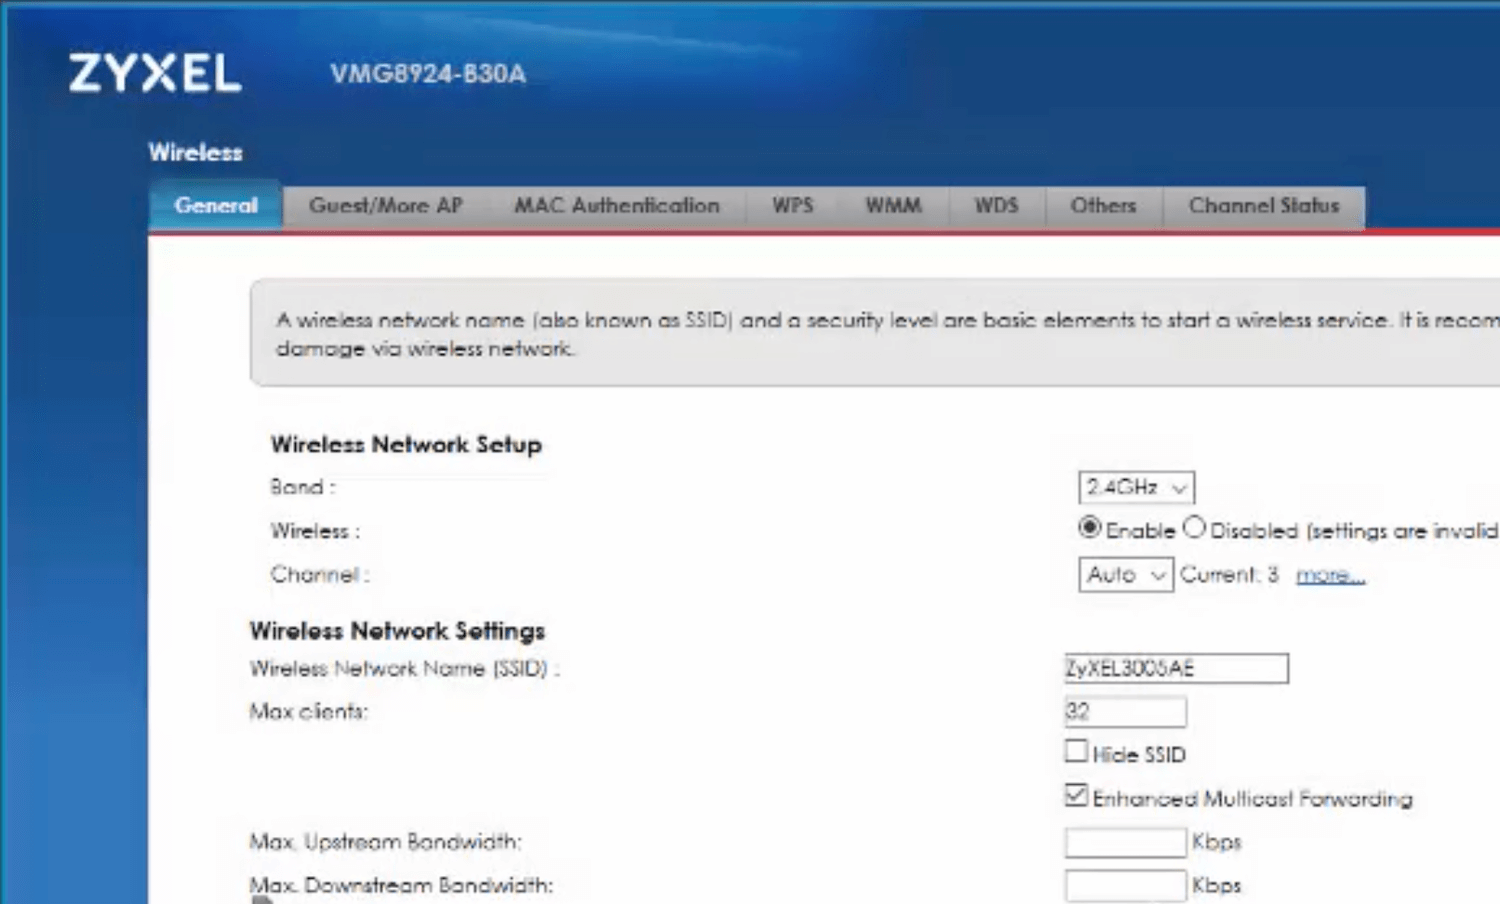
- Enter the Wi-Fi Network Name in the Wireless Network Name (SSID) field.
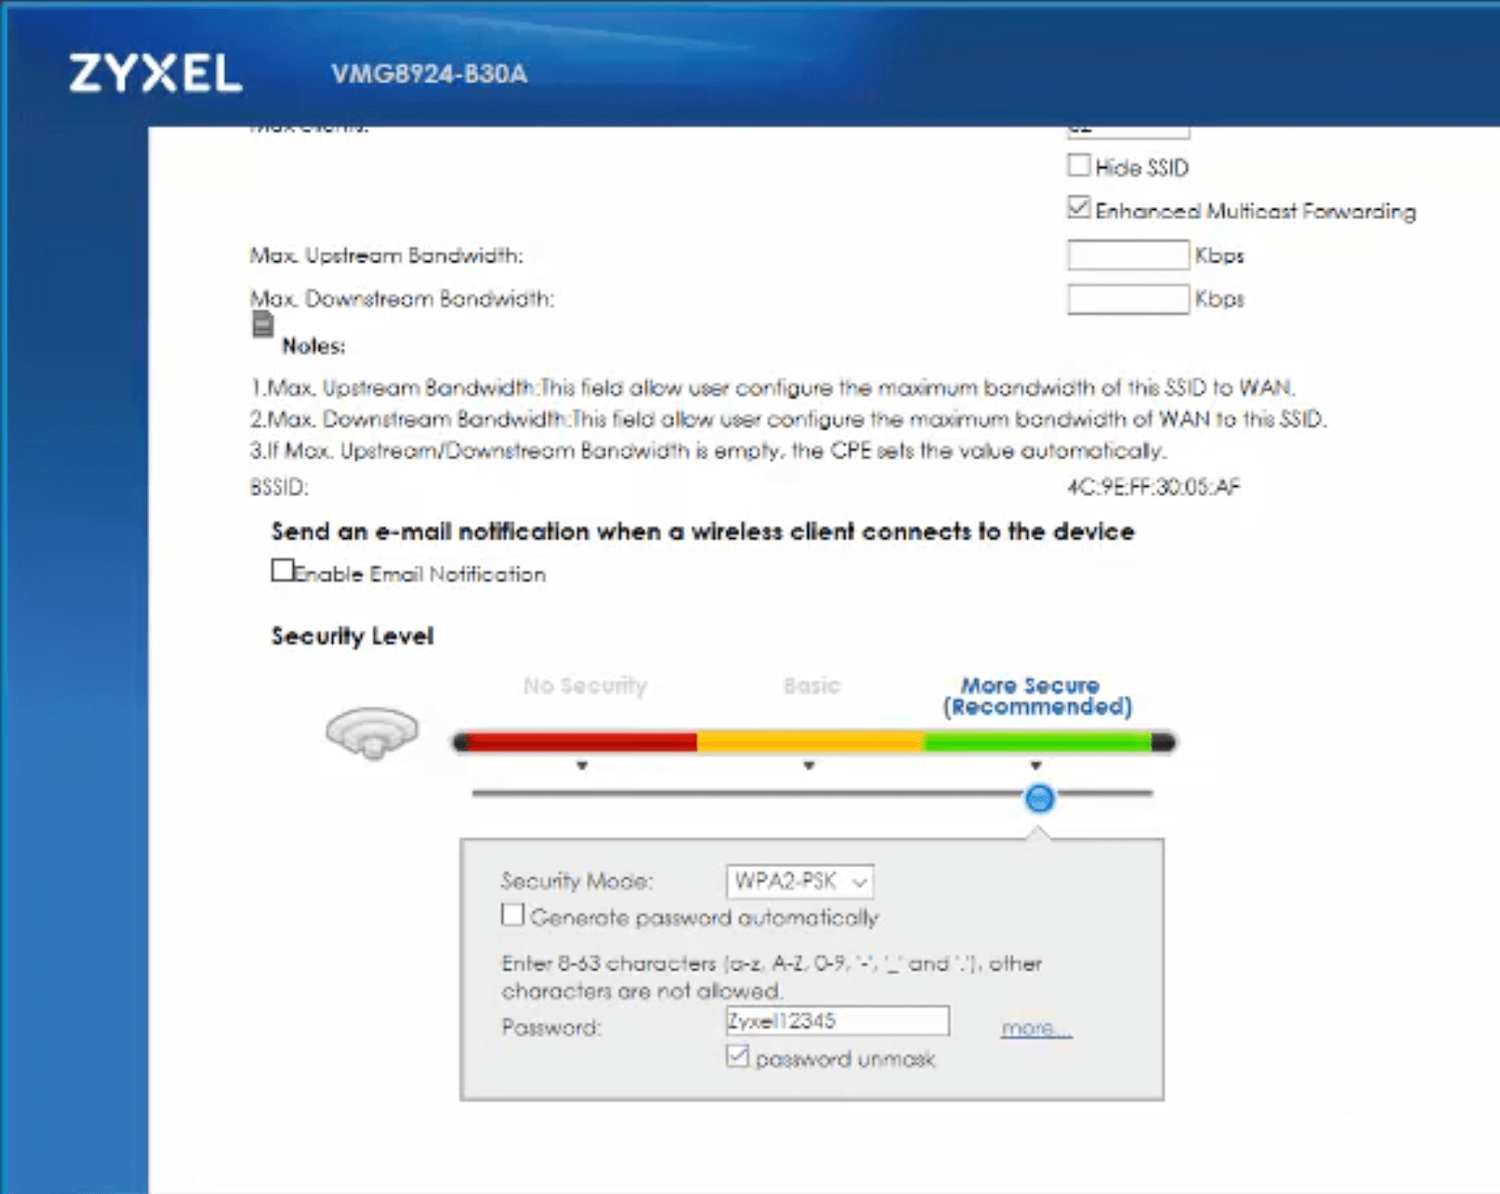
- Enter the Wi-Fi Password in the Password field.
- Click Apply.
- Open a browser and type http://10.0.0.1 in the address bar.
- Enter the Username and Password and click Login.
- Select Advanced > WLAN > 2.4G Basic Network/5G Basic Network.
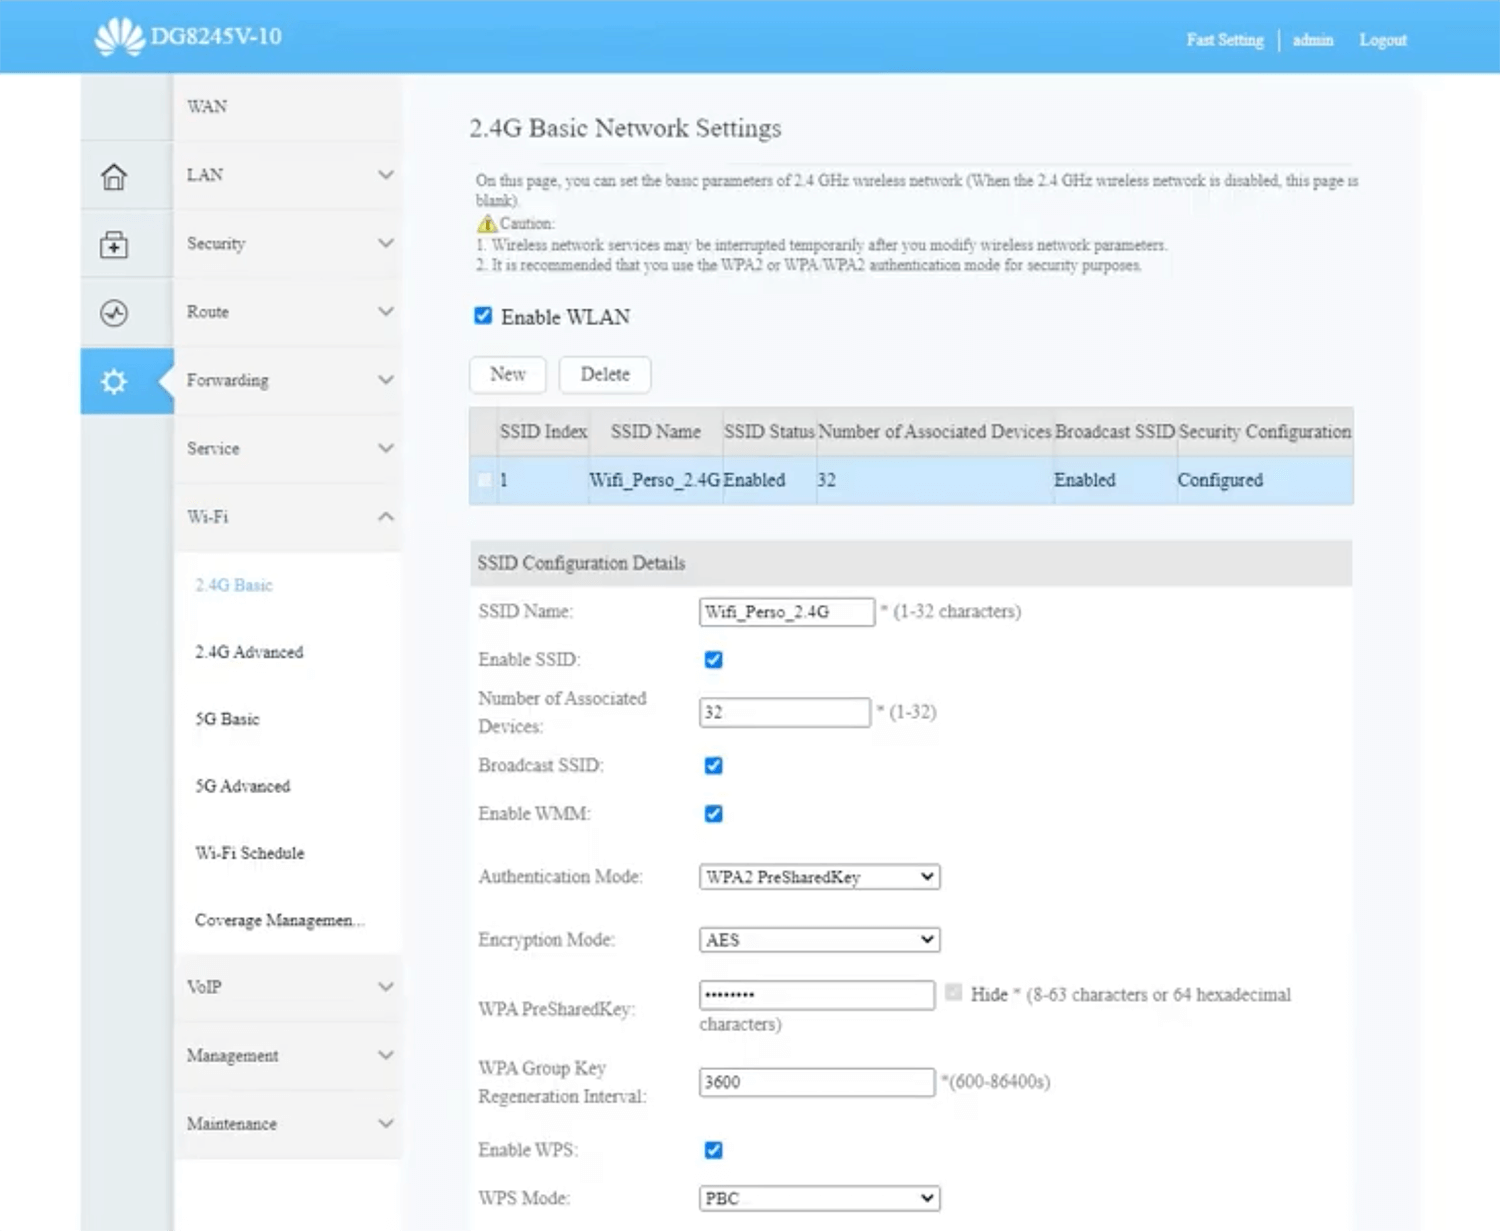
- Enter the Wi-Fi Network Name in the SSID Name field.
- Enter the Wi-Fi Password in the WPA PreSharedKey field.
- Click Apply.